1. Optional Mods
You may have noticed as soon as you opened Mod Organizer 2, that there are mods tagged with [OPTIONAL]. These mods can be toggled on based off of personal preference before starting your game.
However, note that it is not safe to disable these mods mid-playthrough so if you find that you are not enjoying them, do not disable them mid-playthrough. Instead, enable the ones that interest you and playtest for a bit, understanding the mod and ultimately deciding if you want to keep it enabled or not.
Note that any mods under Wasteland Prospects – Addons are intended to keep enabled for the theme of the modlist but are not necessary. However, do NOT disable any mods tagged with [REQUIRED]. Negative effects and consequences are bound to occur if doing so.
Mods color-coded with the same color, like the below picture, are meant to be enabled together, or as specified in the note, to choose out of the ones color-coded the same.

For instance, you have a choice of two weather mods, Altitude and Desert Natural Weathers w/Neutral Weathers for NVR. The blue color-coded options are intended to be enabled, but as seen in the notes are not required to be enabled all at once depending on the notes.
Though, another example will be DXVK, which by default is completely disabled. The options under DXVK are specific to your system. Due to the nature of DXVK, only one version can run at a time. In this case, you would want to select one of three light blue color-coded options. If you do enable DXVK, you will additionally need to enable the Grass Remesh option below the three choices.

2. Performance Optimization
DXVK and Special K
DXVK and Special K are great programs to help reduce latency, as well as significantly improving performance. Note that both DXVK and Special K are already installed and enabled in the modlist for you, to use at your own leisure.
To understand whether your eligible for DXVK and/or Special K, please refer to the FNV Performance Guide. It may seem intimidating and abrupt at first, but please do read through this and understand the terminology and fundamentals of this guide. Otherwise, you may be gimping yourself out of a HUGE performance boost.
Note that you only need to refer to the Graphics Drivers and Windows section, as everything else before that is already handled within the modlist. Anything else after that is purely for your own disposal, for you to tweak to your personal system. It is highly recommended to install DXVK when possible. Most modern GPUs natively support DXVK, so you simply only need to follow the instructions provided.
For Special K, be sure to set the framerate limit to your monitors refresh rate, which can be found by right-clicking your desktop, going to Display Settings, then clicking Advanced display and finding the refresh rate option at the bottom.

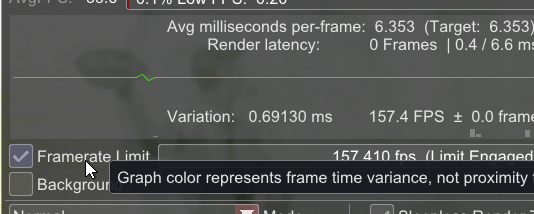
You can then set the framerate limiter in Special K by launching the game, pressing CTRL + Shift + Backspace and finding Framerate Limit.
Please refer to the detailed instructions in FNV Performance Guide for setting it specific to your setup.
If you’re having issues after installing Special K and DXVK, try disabling DXVK and running the game with just Special K, and vice versa.
Resizeable BAR
Resizeable BAR is a unique feature to NVIDIA 30 series graphics cards, that utilizes a feature with PCIe slots on your motherboard to operate at a more optimal and performative speed. ReBAR can and potentially will increase your performance by around 20%, but may vary on each persons system.
Per the NVIDIA website:
Resizable BAR is an optional PCI Express interface technology. As you move through a world in a game, GPU memory (VRAM) constantly transfers textures, shaders and geometry via many small CPU to GPU transfers.
With the ever-growing size of modern game assets, this results in a lot of transfers. Using Resizable BAR, assets can instead be requested as-needed and sent in full, so the CPU can efficiently access the entire frame buffer. And if multiple requests are made, transfers can occur concurrently, rather than queuing.
You must note that this is ONLY AVAILABLE FOR 30 SERIES GPUS. In order to find if you’re eligible for Resizeable Bar, or ReBAR for short, check out the specified requirements on the NVIDIA site.
It it necessary to make sure that you 1) have the latest BIOS and VBIOS versions for your motherboard and GPU and 2) you’re on Windows 10/11 and have any of the specified system requirements on the website.
If you meet these requirements, then you can enable ReBAR via your BIOS under PCIe Settings. The setting name may vary depending on your motherboard. It is highly recommended to follow the installation instructions on the NVIDIA site.
3. New Vegas Reloaded
New Vegas Reloaded, or NVR for short, is no longer supported on the list and will not be supported for the time being. It has become problematic in the sense of crashing and graphical issues, so for now, it will not be supported in hte list.
4. Mod Configuration
There really isn’t much to configure when it comes to the mods in this modlist, as most have INIs with the mod itself that are already configured to a proper setup. However, there are some exceptions that do require manual input in the Mod Configuration Menu.
After starting a new game, pause the game and press M to open the MCM. Find and locate Vicious Wastes, Bleedout, and Alternative Repairing. In the Main section for each of those mods, scroll down until you see Load Preset. Do this for all three of the mods.
Other configuration menus in there can be left as is, but may be tweaked to your personal preference if so desired.